
The Restoration Process - The Wobbly Grandfather Chair
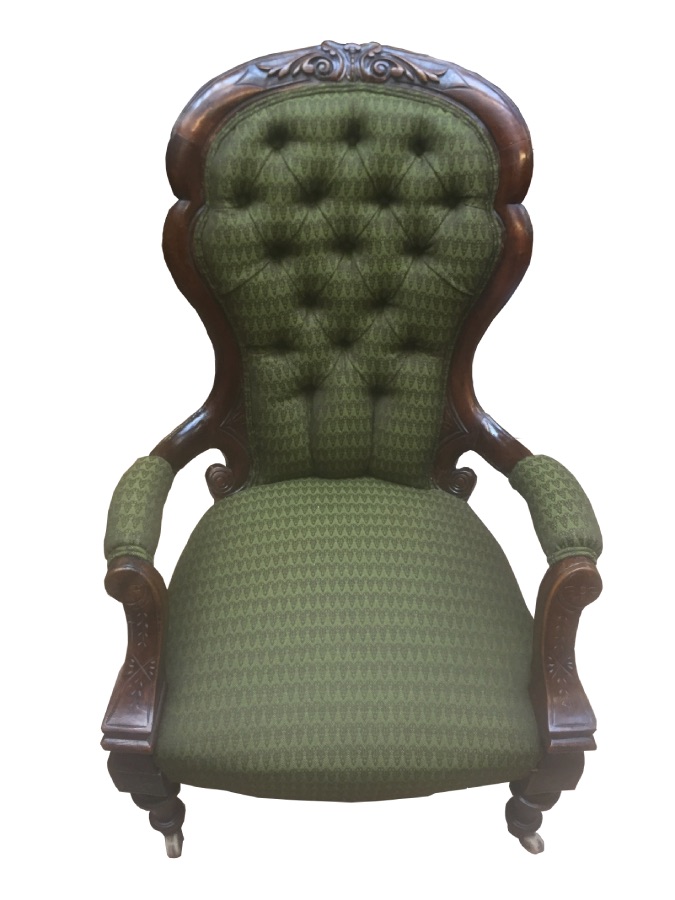
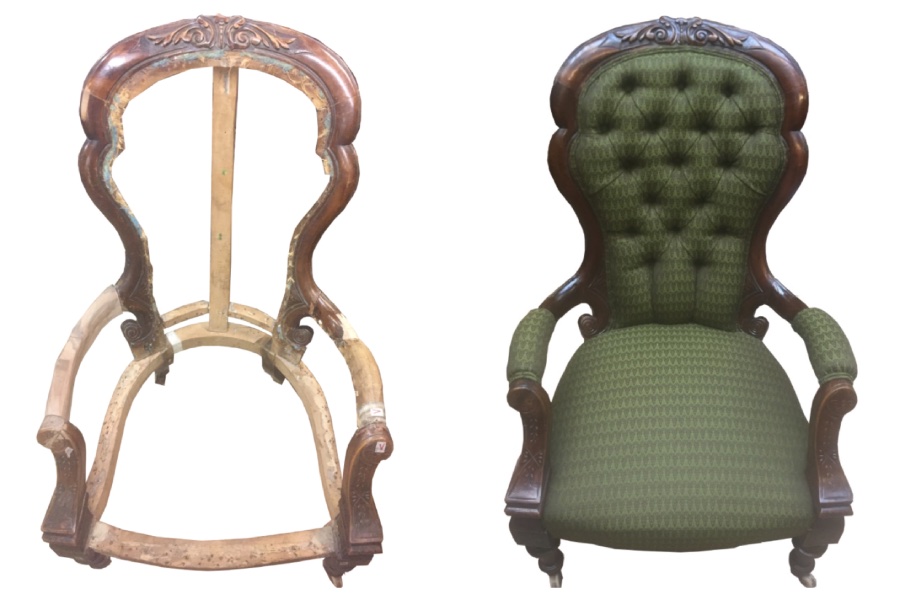
This article will be the start of an ongoing series in which us folk from the After Noah Workshop explain, in a little more depth, the different steps it takes to restore an item of furniture back to its former glory. To begin with, we'll be taking a look at a project from last year: a Victorian Grandfather Chair. The first photo here is the finished product to give you an idea of what it should look like before we show you the path we took to get there!
 When this particular Grandfather Chair came into our workshop, there were several things its owner asked us to do; their main desire was to have it reupholstered and repolished. In order to effect the former, we first had to dismantle and reglue the entire chair, as it was very loose at almost every joint. In addition to this, the arm on the left in the picture above was shattered into several pieces, as well as the very top of the leg where the two join.
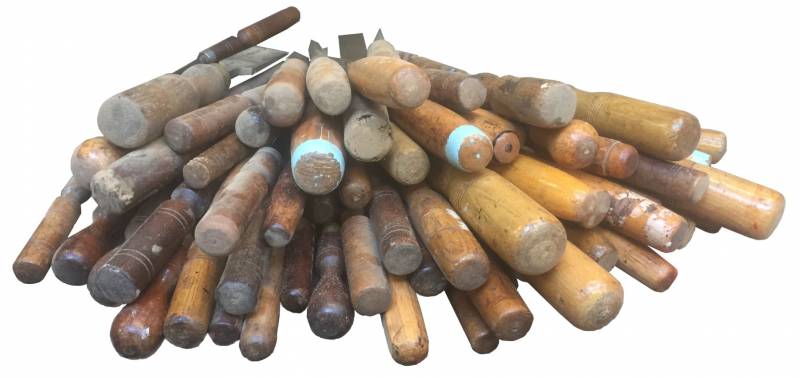
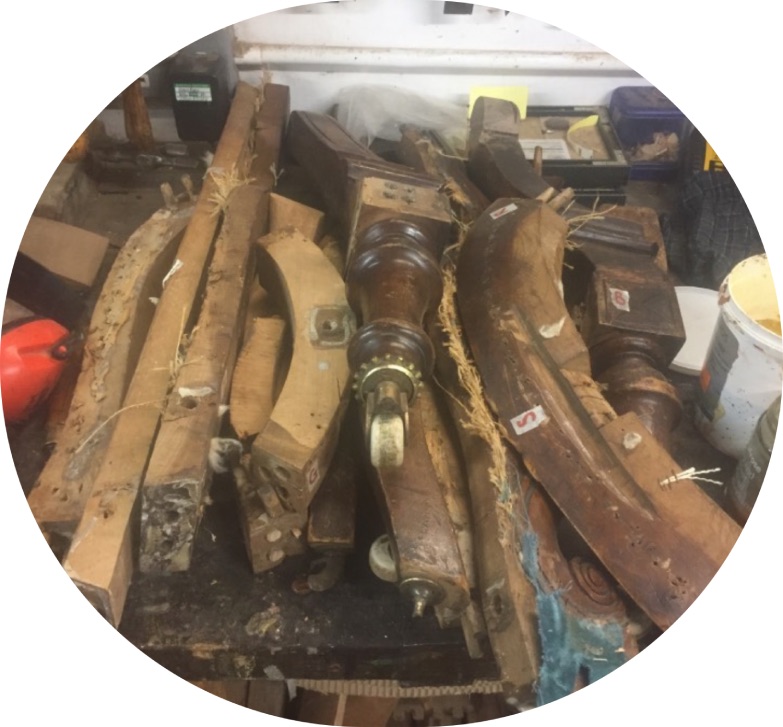
To begin with, we had to remove the old, worn out upholstery (which was really the only thing keeping the chair together). This is held on by many hundreds of small upholstery nails and tacks and it can be quite a time-consuming process to extract them; we have to make sure they're all removed so that our upholsterer can carry out their part of the work effectively. Once this was done, it was time to knock the chair apart at every joint (but not before we'd labelled them to avoid any confusion!) - this is usually done with a rubber mallet to prevent any denting of the wood. The next picture shows how daunting the task ahead can sometimes appear...
At this stage, we determined that keeping the original broken arm wasn't an option, as the timber was also affected by woodworm - this renders the wood very soft and brittle and would mean that, even if we could reglue the pieces, it wouldn't be robust enough for everyday usage. For now, we set about cleaning the old glue from the joints, then regluing the chair's back in one section and its base/legs in another - doing it separately and then joining them is often easier, but in this case also necessary whilst we remade the broken arm.
Next, we retrieved a section of Walnut from our stocks of reclaimed, old and new timber. We have shelves piled to the ceiling with many varieties of woods commonly used in furniture making, as well as some more exotic and odd types too. Once we had a suitable piece, we taped the broken arm together and used it as a template on our new section of timber. At this point, we only needed the rough shape of the arm - the process of carving its curves and details would mostly take place once we had rejoined it to the rest of the chair.
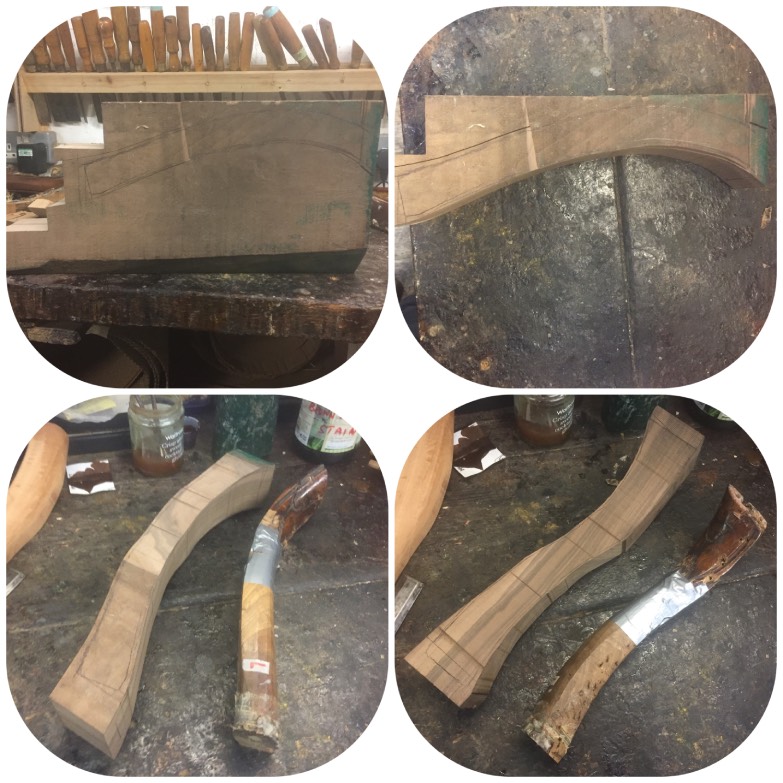
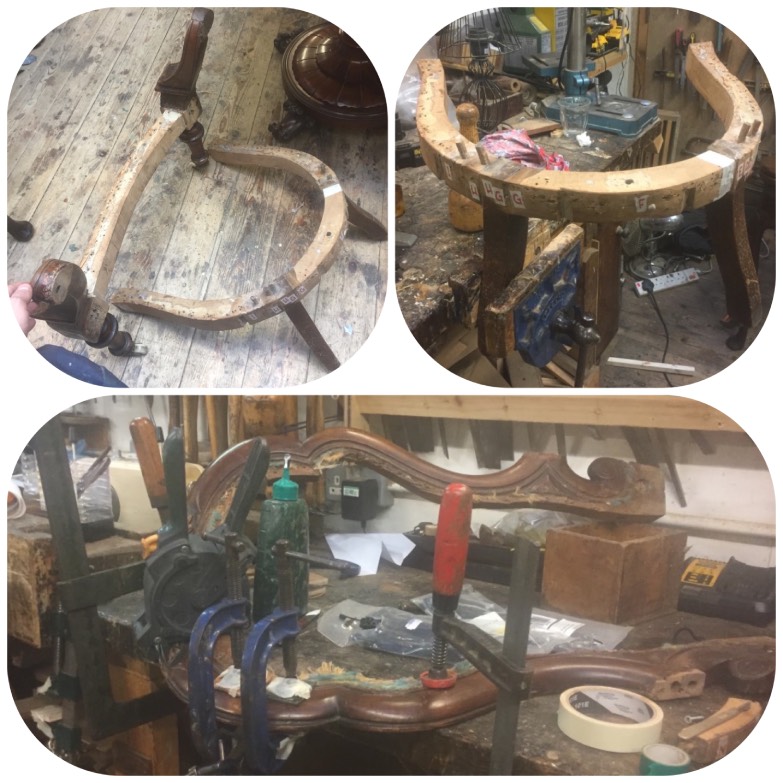
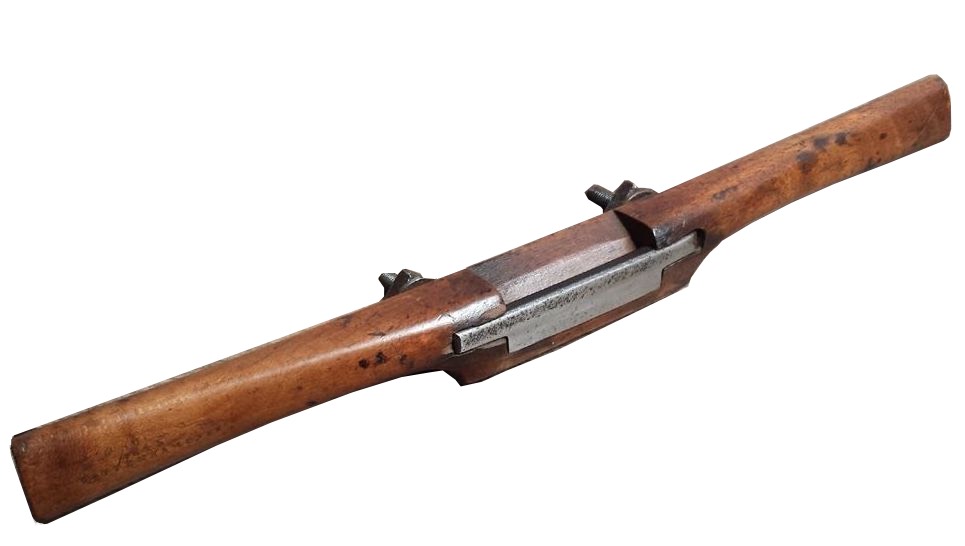
Before gluing the arm into place, we tested it dry to make sure the angles were right and that it was a snug fit. Once we had done this, we drilled holes out on either end for some 10mm dowel - you can see this in the picture on the right-hand side below. The purpose of the dowel is to slot the pieces of the chair together like a jigsaw and provide stronger gluing surfaces; the end grain of wood acts a bit like a sponge and draws most of the glue away from the joining surface, resulting in a weak joint that is liable to fail. At this stage, we also shaped the curve of the arm a little more - the best way to attain smooth curves and rounded edges is by using a tool called a spokeshave, which you can see below too.
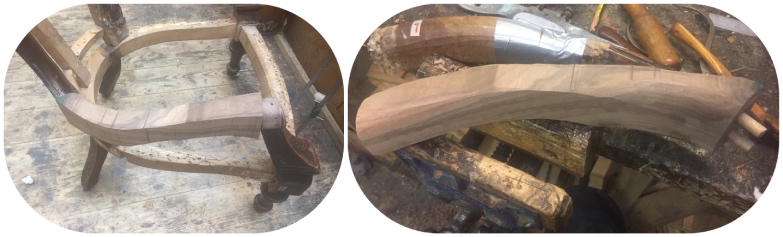
Once the new arm was glued into place, the rest of the carving was carried out; in reality the section that mattered most was the small part nearest the back of the chair, as the rest of the arm would soon be upholstered and hence not seen; much of the shaping of this part of the arm would be done during the upholstering phase and so only a relatively rough carving was necessary.
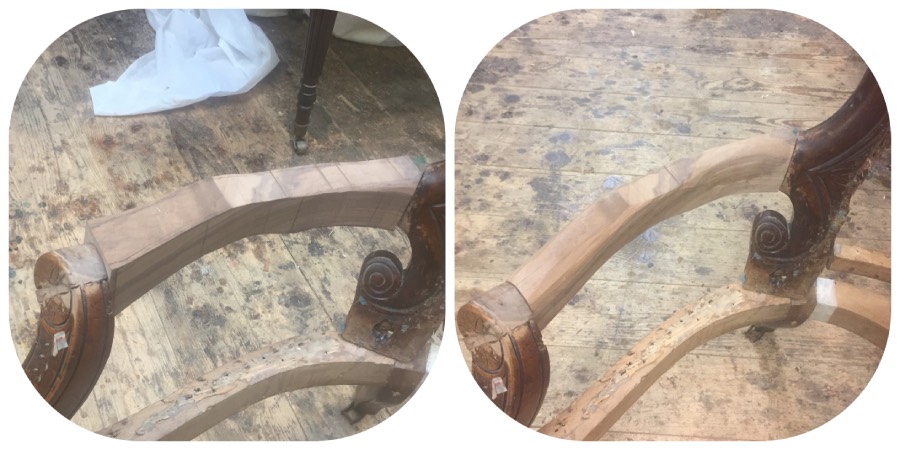
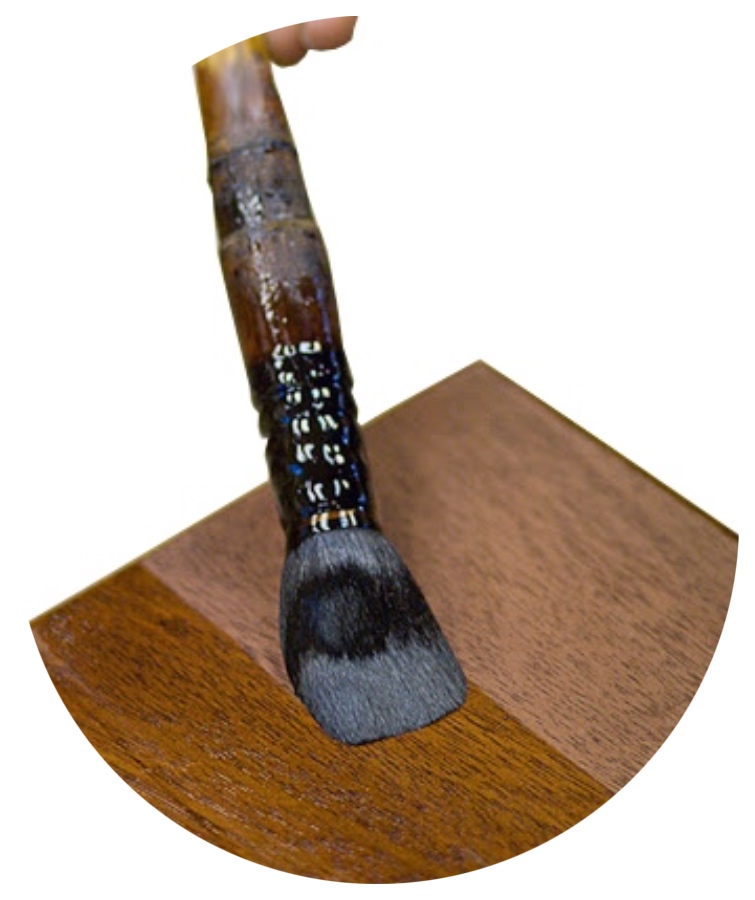
With the carving complete, the next stage was to give the arm a good hard sand, using progressively finer grade sand paper, and then blend it in with the rest of the chair using stain followed by polish. Although it's often unnecessary to apply stain, the natural colour of this piece of timber was a little too light, so we used some Walnut stain weakened slightly with White Spirit. Next we applied Shellac sealer - this helps fill the grain of the wood in order to get a smoother, shinier finish once the final coats of polish are applied. These last steps are carried out once the Shellac has dried and been rubbed down with fine wire wool to remove any roughness. Unfortunately, we didn't take many photos of this stage - you'll have to wait until a new project walkthrough for more pictures of this process. Below, however, is an example of the type of brush that we use to apply Shellac and polish.
The finish of the rest of the chair was looking a little worn out, so next we cleaned the entire frame with a specially-refined concoction of ours that miraculously gets rid of the years of dirt that build up through everyday use of furniture (as well as any specks of paint from that time you repainted the living room and forgot to cover everything in dust sheets...). We then applied a new coat of polish. The only thing left at this stage was to hand the chair over to our expert upholsterer to work their magic! Once it was back with us, we gave the chair its final checks and - very carefully so as not to spoil the lovely new fabric - gave it a wax. The waxes we use in the workshop are made from either Beeswax, Carnauba (from the leaves of a plant native to Brazil), or Shellac Wax (from the resin produced by the Lac bug). This last stage protects the finish of the wood and gives it a nice sheen.
This was a particularly satisfying project to work on; it's often hard to tell just how much work goes into restoring an item of furniture when you're looking at the final product, so seeing the comparison of the chair in so many pieces at the beginning to how it turned out really reaffirms why we love doing what we do!
If you enjoyed our step-by-step breakdown of this project, keep your eyes out for more in this blog series in the weeks to come.
If you're interested in having a piece of furniture restored, click here for more info.